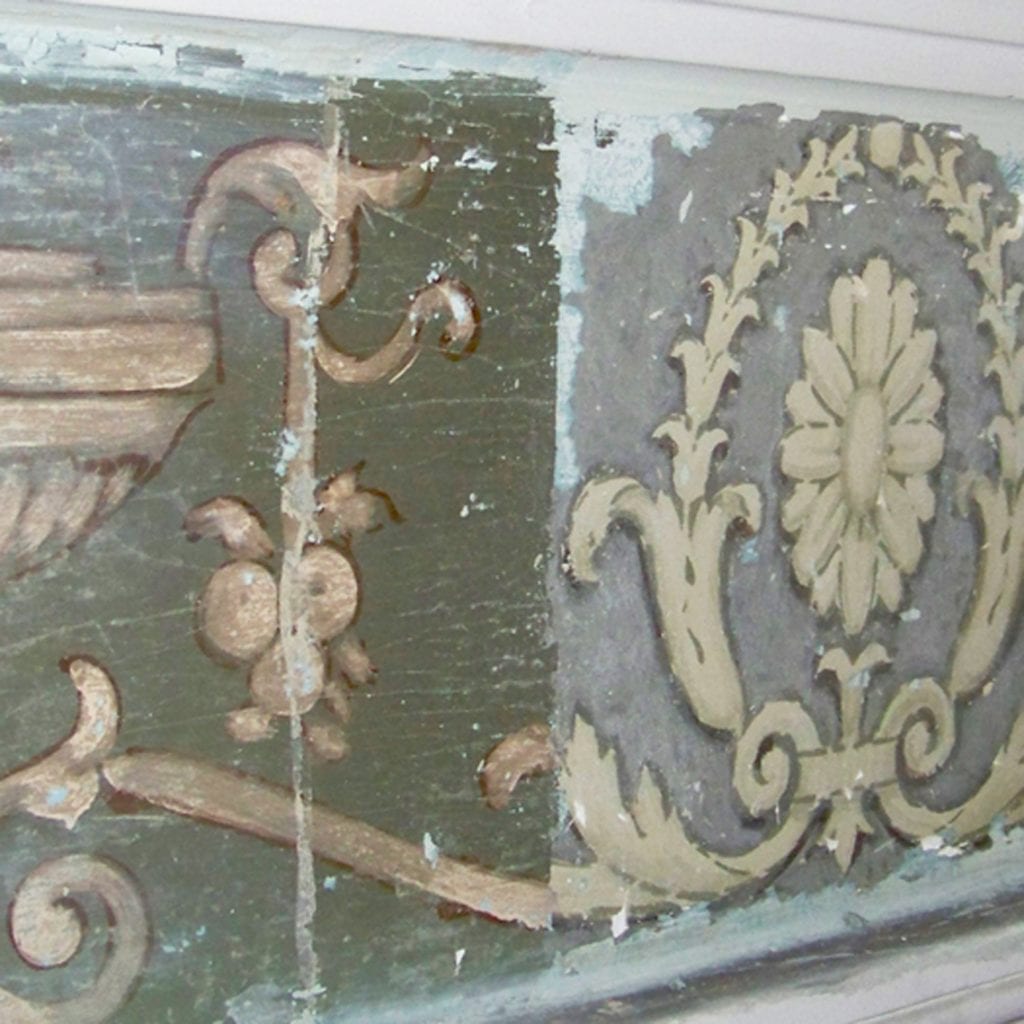
During the onsite visit of a Paint Investigation, the paint samples collected are cataloged and labeled based on the location of their extraction and then brought to the lab. The laboratory analysis of these paint samples is called microscopy. The process involves the use of a microscope to explore the different layers in each sample, in order to reveal the history of the paint and finishes.
Below, we explore the steps in this process, from the physical collection of samples through analysis and the ultimate findings report.
1. Samples are collected for analysis.
Using a microscalpel, the samples of the paint, including the primary substrate, are removed from the wall, ceiling, or decorative element.
Careful study prior to the onsite visit and a comprehensive knowledge of art and architecture allows the expert to select the best locations to extract the samples. The tiny, razor sharp blade cuts easily into the surface without causing a disturbance to the overall composition. The spot where the sample was taken is then labeled, photographed, and often annotated on the architectural drawings for further reference.
2. Collected samples are analyized using a number of different methods.
Microscopy analysis provides a plethora of varied information relating to the makeup and cosmetics of each color or substance found in the sample.
With the impressive magnification ability of the microscopes used, we are able to determine different physical characteristics: Such as color, texture, type of paint/varnish, existence of dirt layers and the composition of the material. This list not only clarifies information regarding the original visual appearance of the interior, but also provides a timeline between each change and the materials used.
A low power microscope is often brought onsite for initial analysis, which is used to establish which samples are the best fit for further study in the lab. Once in the lab, we use a high magnification stereomicroscope or a polarizing light microscope in order to view the samples under both incident/reflected and ultraviolet illumination.
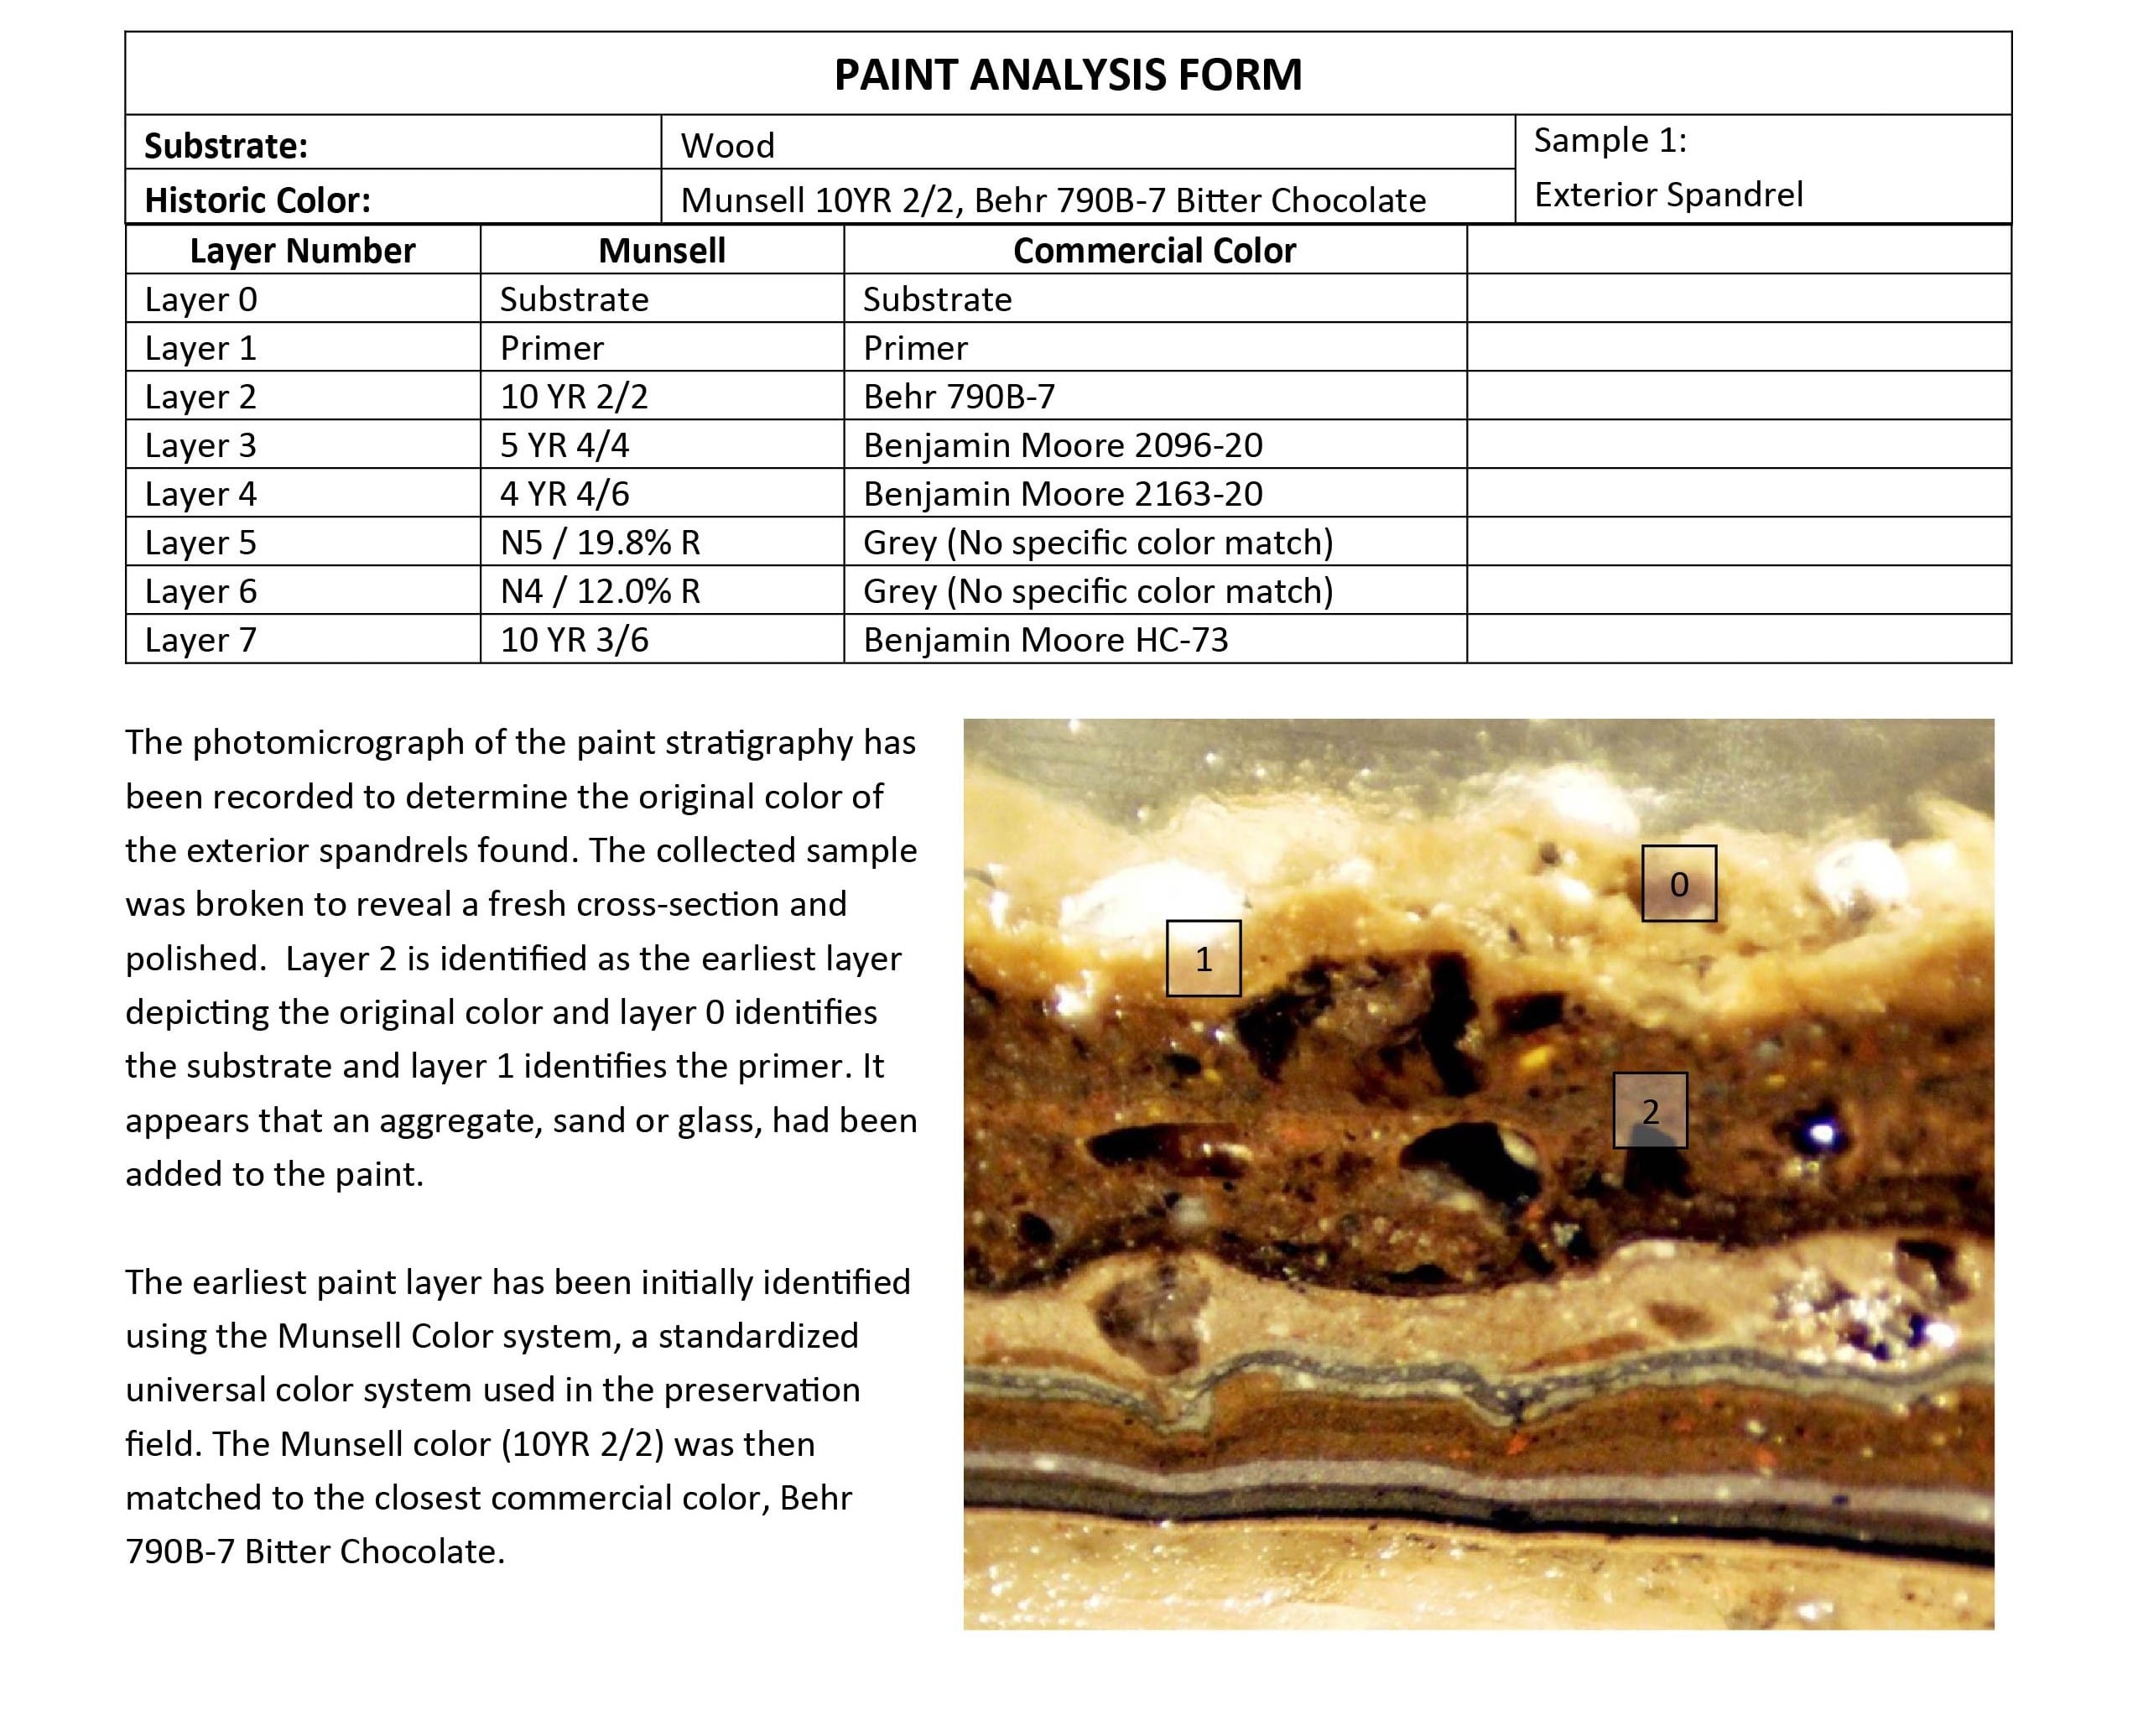
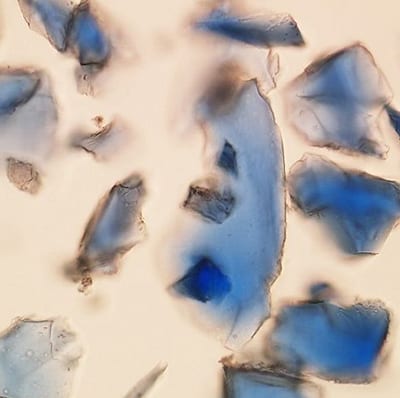
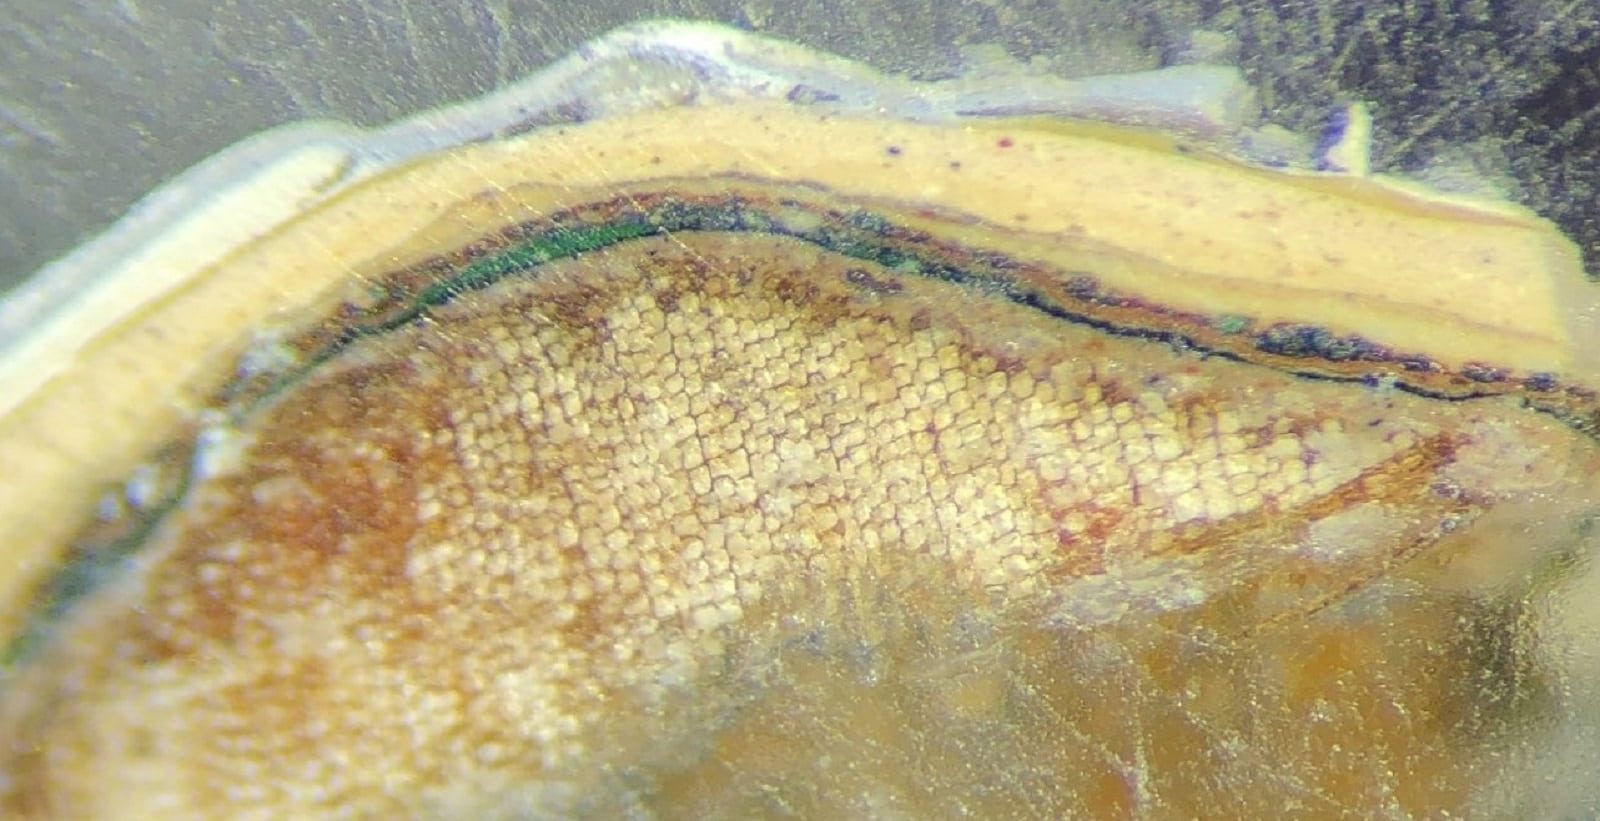
The sample is magnified from 100 to 400 times to view the layers of paint, varnish, and grime, and are viewed under different conditions to gather various information and understand the different elements involved. The paint samples are photographed under the microscope following analysis; these photographs (for an example see Img. 2) are then included in a final report.

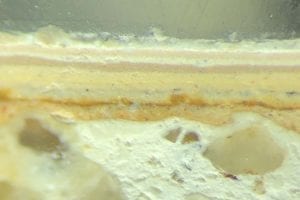
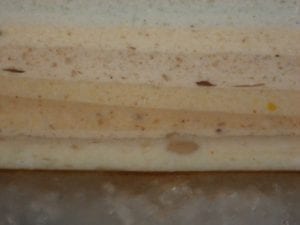
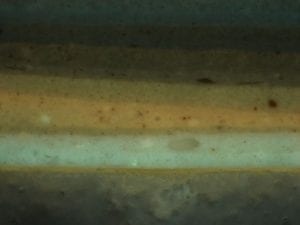
(Image 1) Paint sample collection. Numbers mark the location of each sample. (Image 2) Paint sample photographed under microscope. (Image 3) Paint sample under reflected light. (Image 4) Paint sample under ultraviolet light.
Ultraviolet Analysis
Using ultraviolet light allows us to identify the different varnishes and staining that are invisible using reflected light. This perspective also provides a distinction between where one paint scheme ends and the next begins. Ex. (Img. 3)
Reflected-light Analysis
Reflected natural light—without the intrusion of glares—provides the conservator with the information necessary to color match the different paint campaigns using the Munsell Color System and the closest commercial match.
The Munsell Color System spans all imaginable hues, saturations, and values apart from the popular trends of commercial paint. This spectrum of color allows us to base our color match scientifically from the information collected during the analysis, rather than based on the modern tastes and trends.
3. Results and interpretation of the analysis are compiled into a findings report.
Once all of the proper information has been collected, a report summarizing the findings is compiled for future reference.
The layers found are numbered and identified, along with a Munsell and commercial color match for each paint layer. Important information included in the summary of each sample should include the date that it was collected and analyzed, the original substrate, period/paint campaign of significance or the date of the most original decoration, and the location from which the sample was extracted.
Microscopy studies are necessary to move forward in a historic preservation project due to the invaluable information the analysis yields. Without careful attention to detail and the ability to deduce historical subtitles, the intention to restore historical integrity may never be achieved.
Sample Paint Microscopy Report: